Large 4-layer sponge cake with pumpkin, chocolate, and walnuts, filled with French-style pastry cream, apricot jam and rich buttercream.
Recipe Intro

Here’s something special for your Halloween celebrations that both kids and adults will enjoy!
This Jack-o’-Lantern cake is a fun treat that can easily be adapted for any occasion – just change the colours and flavours to suit your needs.
While creating the Jack-o’-Lantern shape might seem a bit tricky, the sponge cake layers and filling creams are surprisingly simple to make. You could even turn it into a plain round birthday cake or mini cakes for a simple dessert.
This cute cake is not just eye candy, it is also delicious, moist, soft, creamy and yummy! Pastry experts, please bear with me – this was my first attempt at such a large cake, and I’m still a beginner in the world of baking.
Essential Ingredients
Sponge Cake Base
- flour – use plain white flour
- yoghurt – use plain set yoghurt or Greek style yoghurt
- sugar – Use white caster or granulated sugar. Avoid using brown sugar, it will darken the cake; we want a bright orange for our pumpkin layer.
- baking powder
- vanilla sugar – Do not use dark-coloured vanilla essence
- eggs
- sunflower oil
This mixture serves as the foundation for the cake. you can add various flavourings to this base to create three distinct sponge cake layers.
Pumpkin layer
- pumpkin puree
- cinnamon
- nutmeg
- colour
Chocolate layer
- cooking chocolate
- chocolate extract
- colour
Walnut layer
- ground walnuts
- cocoa powder
- rum
Cake cream fillings
You can fill your cake with just one type of cream or a combination of both. I opted for pastry cream and buttercream to add different textures and flavours. Feel free to get creative and use whatever suits your taste!
Green pastry cream
- egg yolks
- flour
- milk
- sugar
- vanilla sugar
- rum or rum flavouring
- salt
Buttercream
- icing sugar
- unsalted butter
- double cream
- vanilla extract
🎃 While you are here, check out more international pumpkin recipes;
Autumn pumpkin risotto served in cute mini pumpkin bowls 🍂🇬🇧
Roasted pumpkin and carrot soup 🥕🇬🇧
Simple and delicious Italian pumpkin risotto 🍲 🇮🇹
How to make Jack-o-lantern cake?
Prepare pumpkin puree
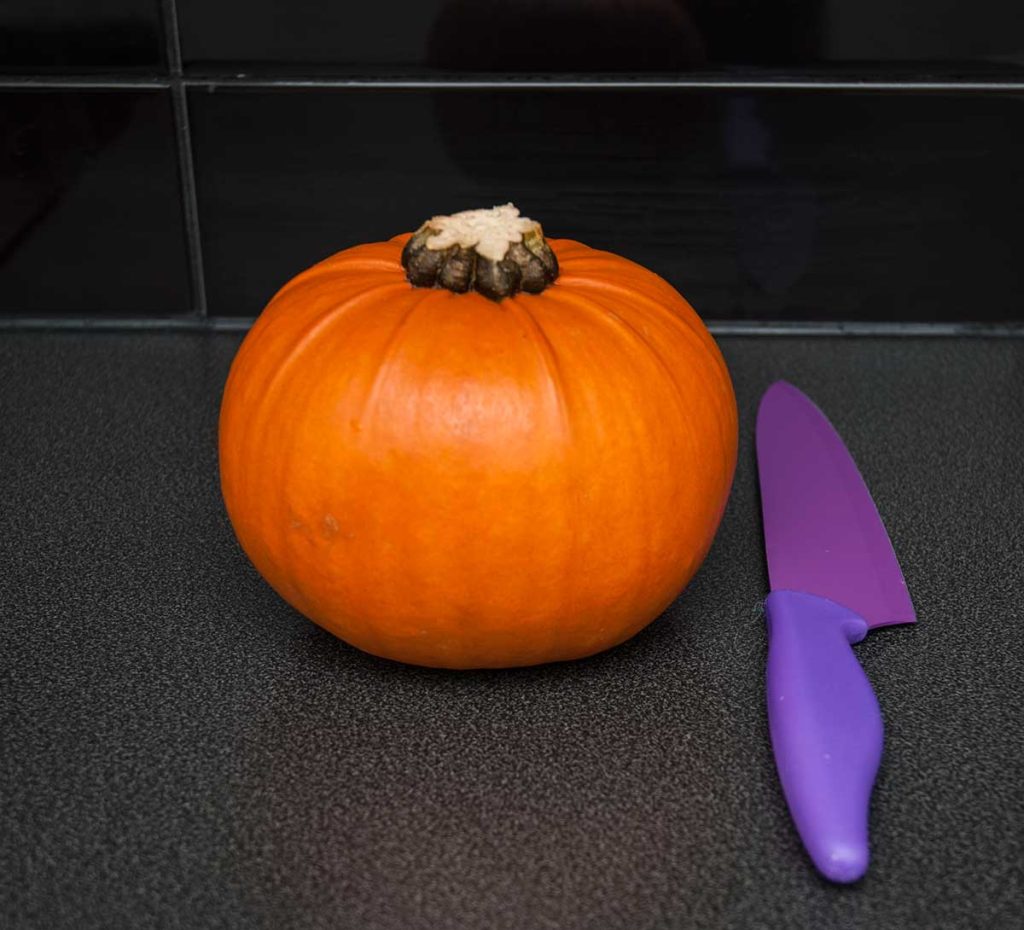
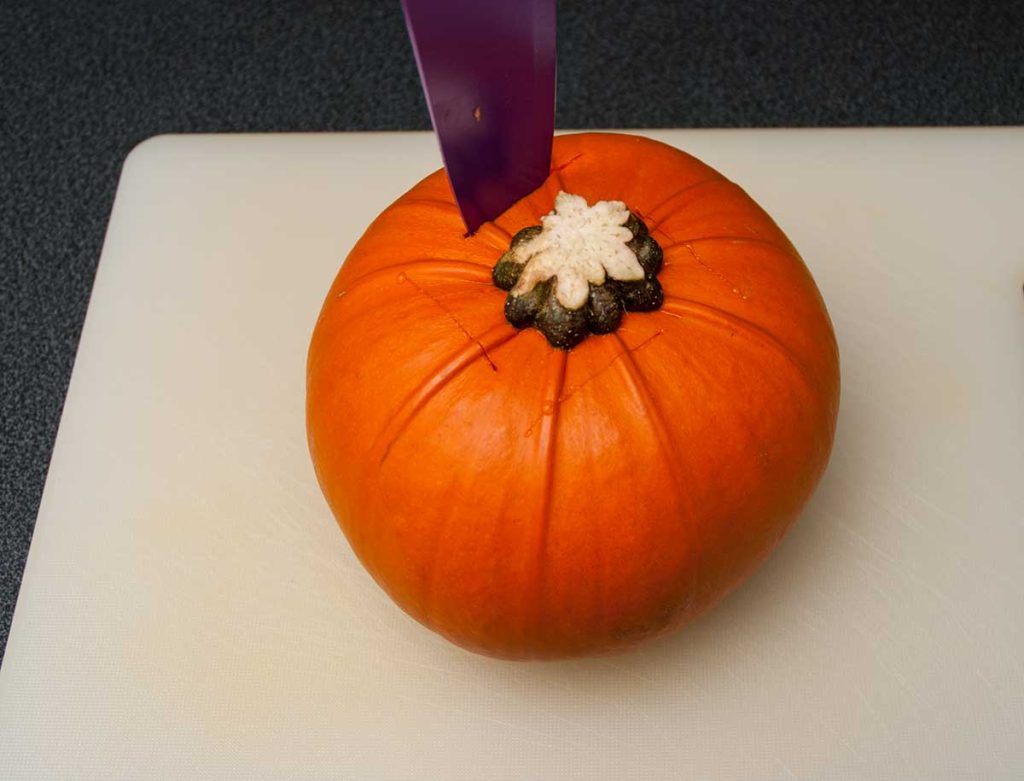
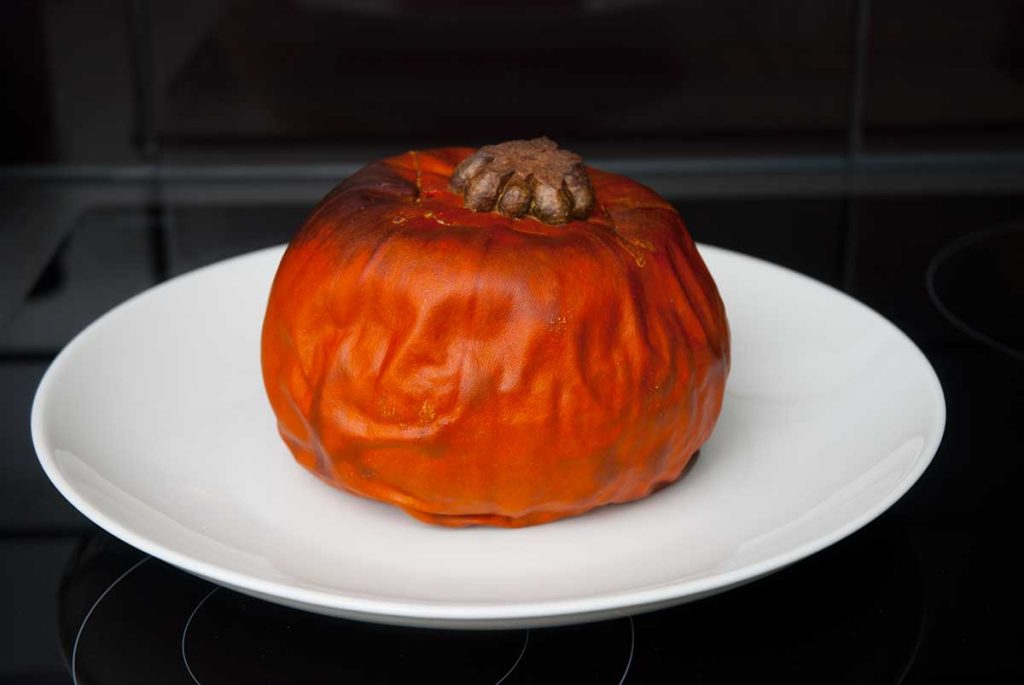
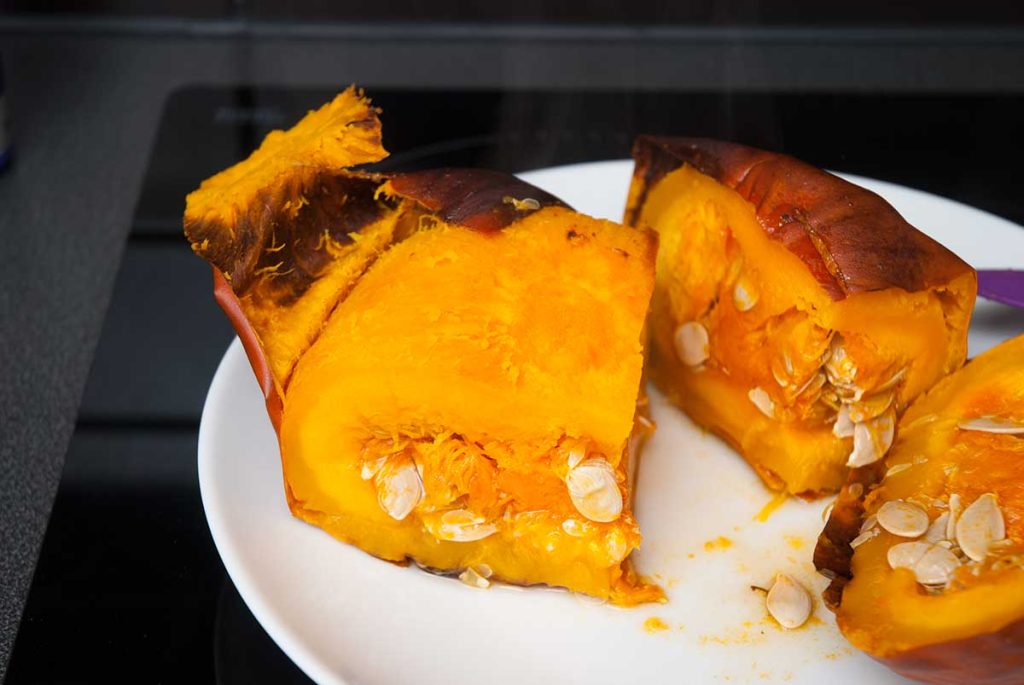
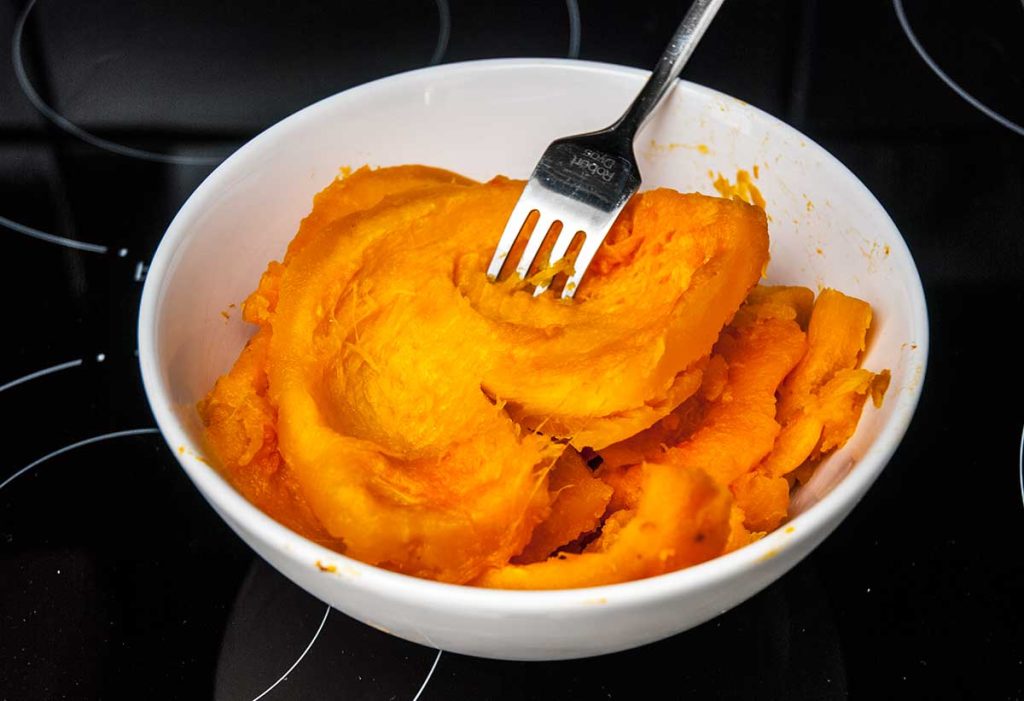
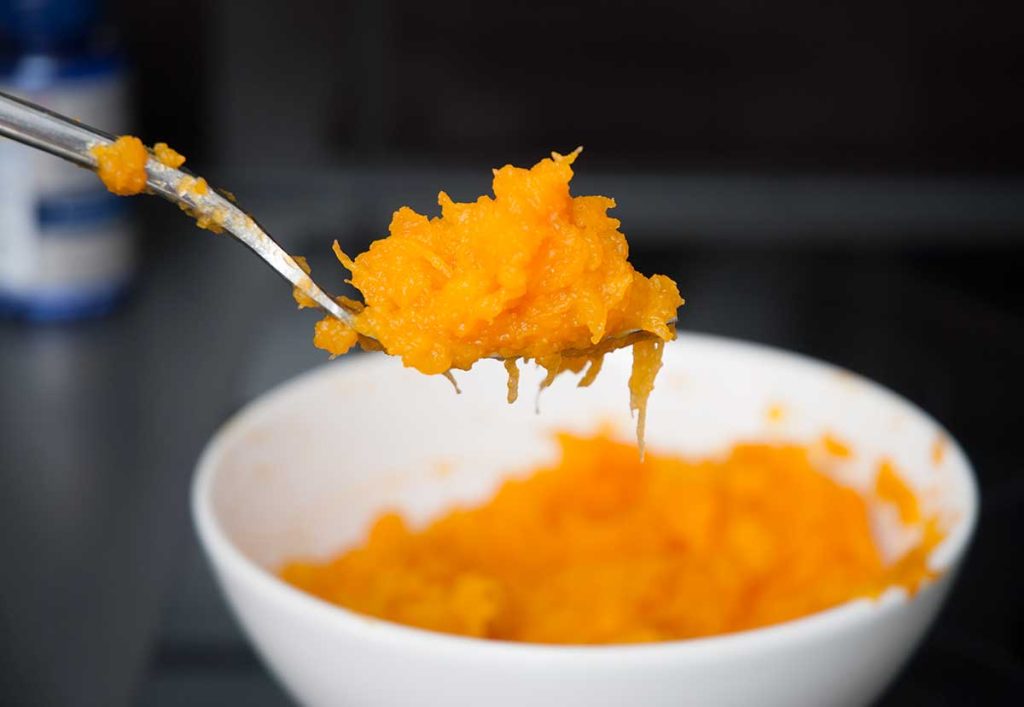
Fresh pumpkins can be incredibly tough to cut. I recently discovered that you can actually roast the whole pumpkin as is, this works perfectly with small pumpkin varieties. The skin separates easily from the flesh, and the seeds can be scooped out in one go with a spoon.
- Before roasting, be sure to score the top of the pumpkin with three or four deep cuts to prevent it from bursting in the oven. Place the pumpkin on a baking tray, no need to oil, and roast at 200°C for about 25-30 minutes, or until it begins to darken slightly.
- Once roasted and cool, cut the pumpkin into wedges, peel away the skin, and scoop out the seeds. When prepared this way, the pumpkin can be stored in the fridge for use in various recipes.
- For this particular recipe, the roasted pumpkin you can simply mash with a fork or blend it to a smooth purée, depending on your preference. If you prefer larger bits of pumpkin in the cake sponge, simply mash it with a fork. For a smoother texture, you can give it a quick whiz in a blender.
Make the Sponge Cake Base
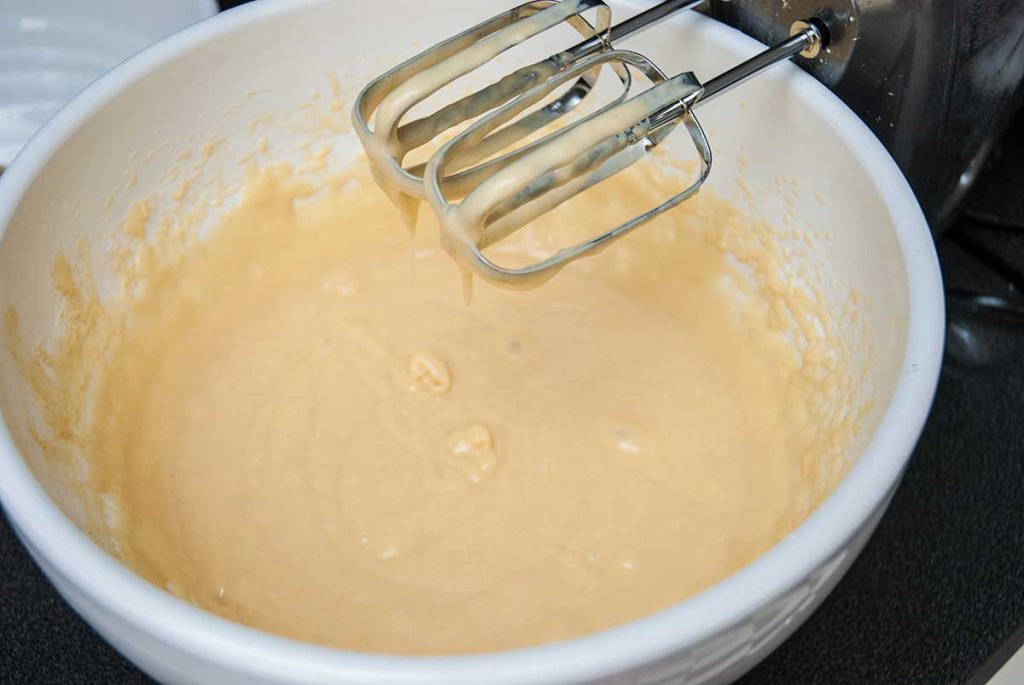
Whisk the eggs and sugar in a large bowl until light and fluffy. Add the yoghurt and oil, mixing briefly to combine.
Sift in the flour along with the baking powder, folding gently into the egg mixture. Be careful not to overmix at this stage to keep the batter light. You should end up with a smooth, thick batter.
Now that we have the base, divide it into two equal portions, then take one of those portions and split it into two again – one for the pumpkin and one for chocolate, and the rest of the batter (2/4) is for the walnut sponge cake layers.
If you prefer, you can also adjust the portions differently; you could divide the mixture into three for only 3 layers, or four, to create four different flavours.
Pumpkin sponge cake layer
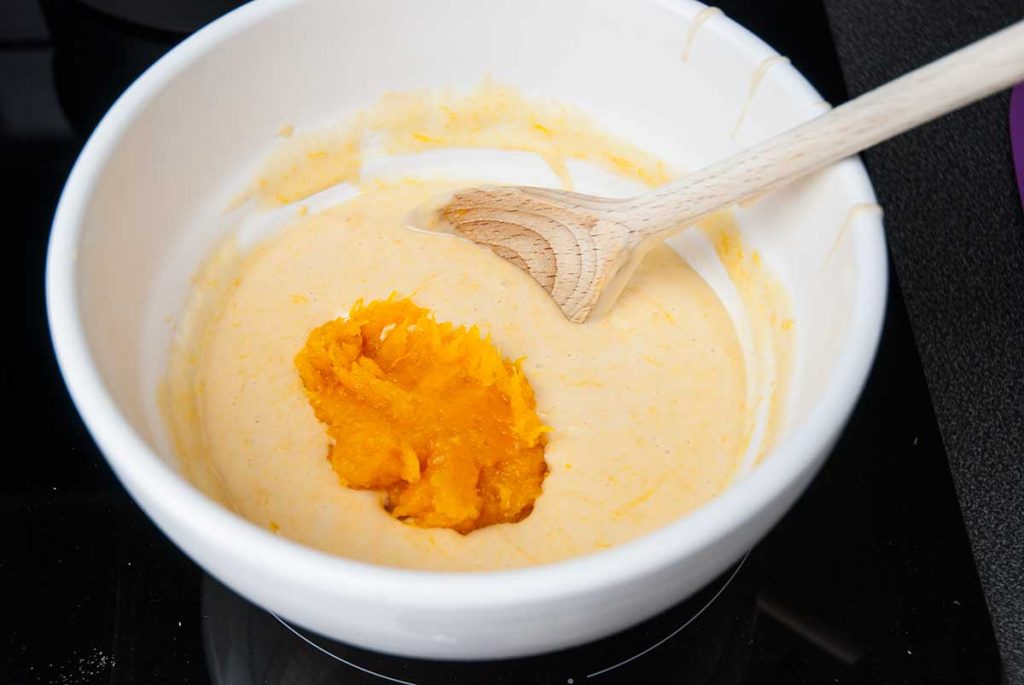
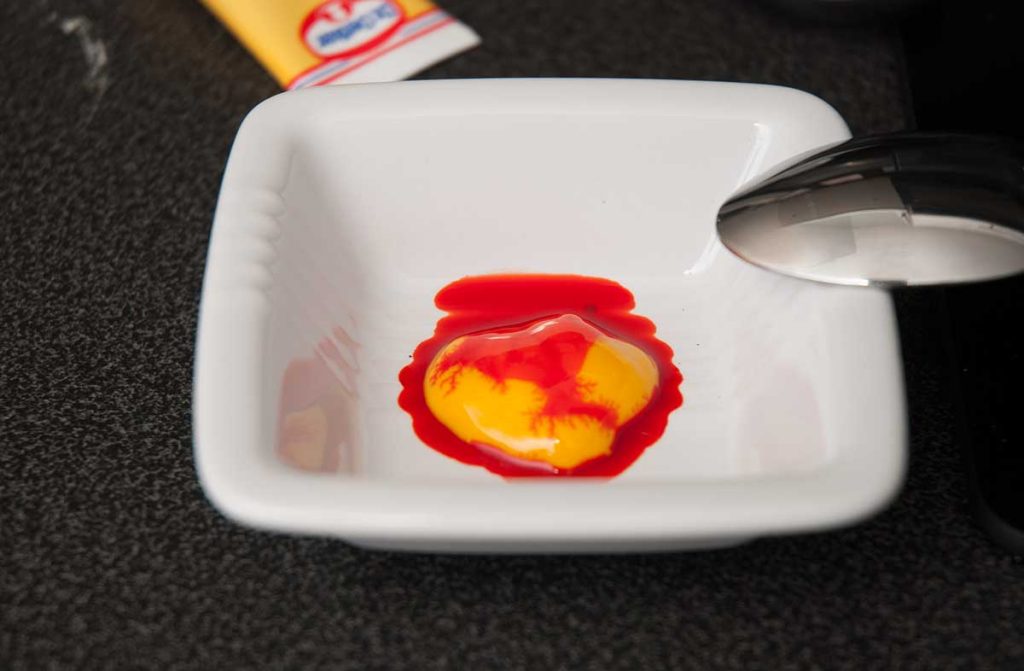
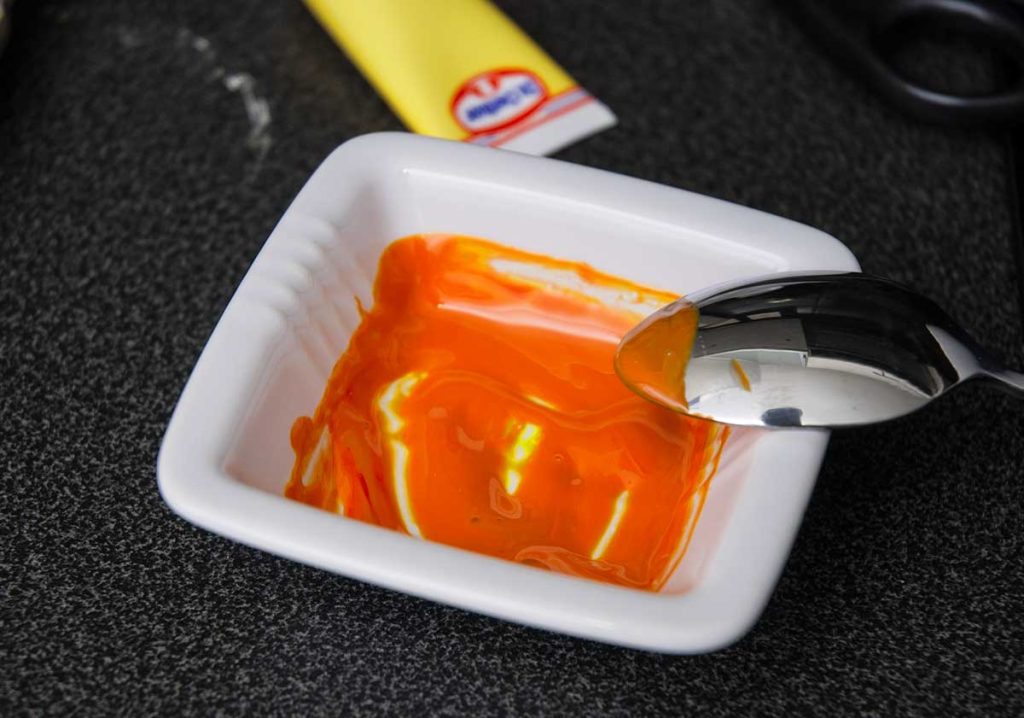
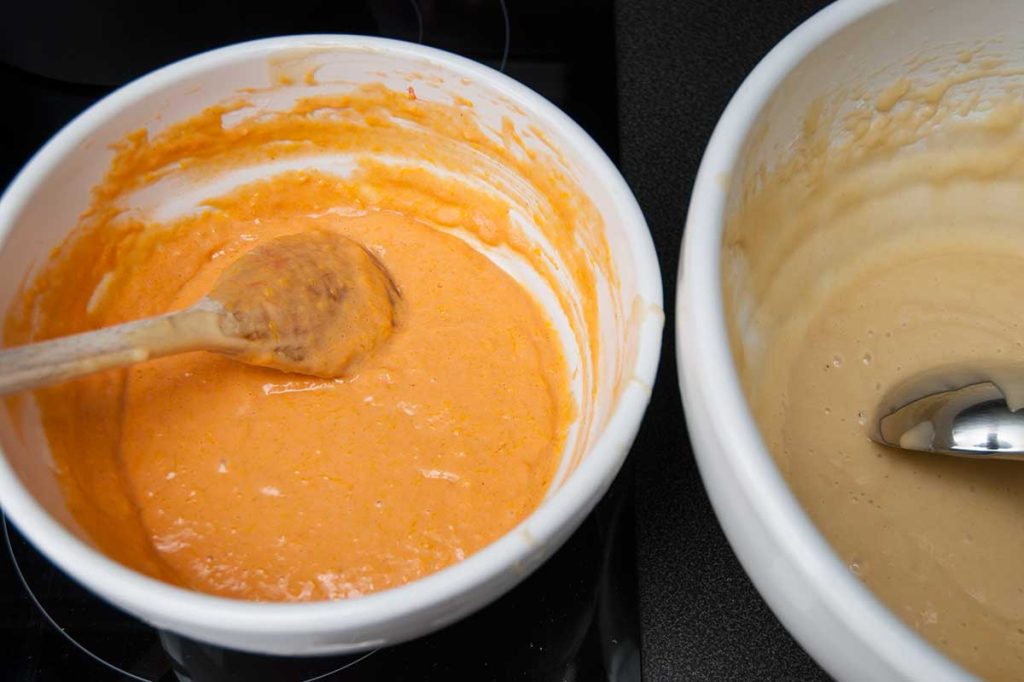
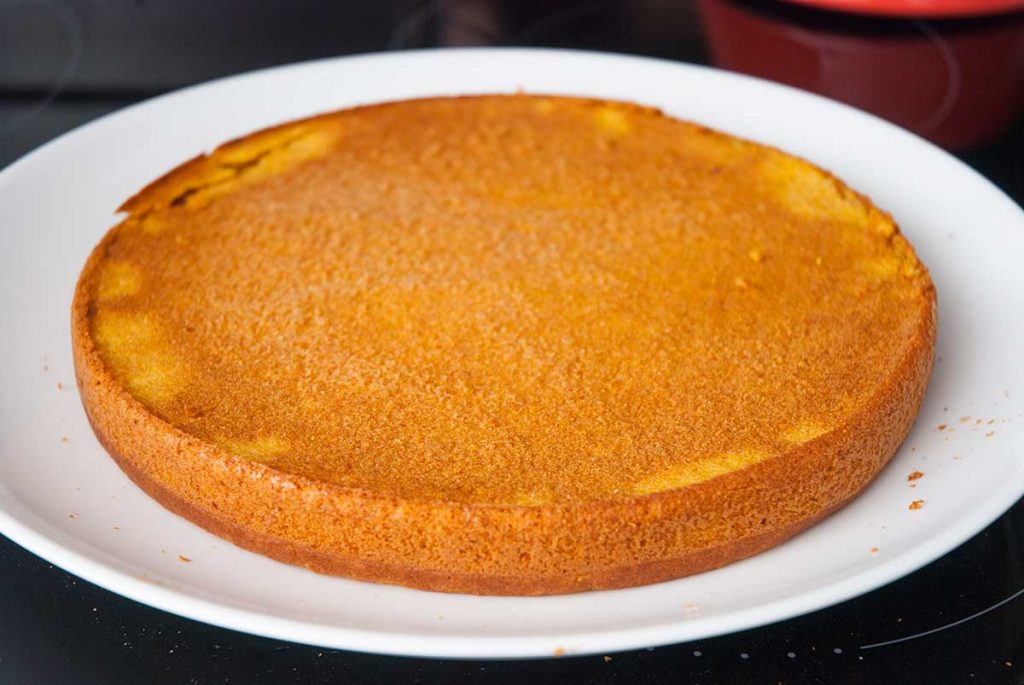
- In the first portion of the batter, add half of the mashed pumpkin along with the cinnamon and nutmeg. Mix gently with a wooden spoon until well combined.
- Prepare the orange colouring: if you don’t have an orange colour on hand, you can mix yellow and red food colouring instead. Add yellow food colouring first, then mix in one drop of red, adjusting as needed until you achieve the desired orange shade then fold it into the pumpkin mixture.
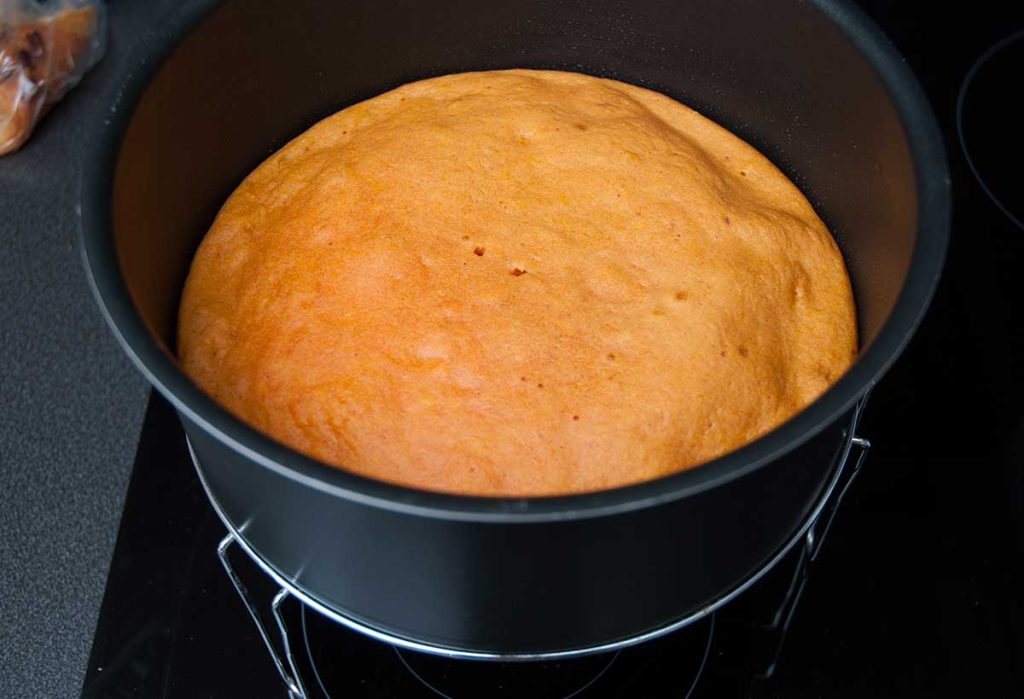
- Add orange colour to the batter and mix well. Pour the pumpkin batter into a 9-inch cake tin and bake at 170°C for about 20-25 minutes. Avoid opening the oven for the first 15 minutes to help the sponge rise evenly.
Keep an eye on the cake as it bakes; it should be cooked through but maintain a consistent orange colour without browning. If you notice the sponge starting to darken too much, quickly cover it with a piece of aluminium foil; this means your oven might be running too hot. Once done, remove it from the oven and put it on a cooling rack to cool.
Tip: To check if the batter is done, insert a wooden cocktail stick into the centre of the cake; if it comes out clean and dry, the cake is ready. If there’s still wet batter clinging to the stick, it needs more time in the oven.
Chocolate sponge cake layer
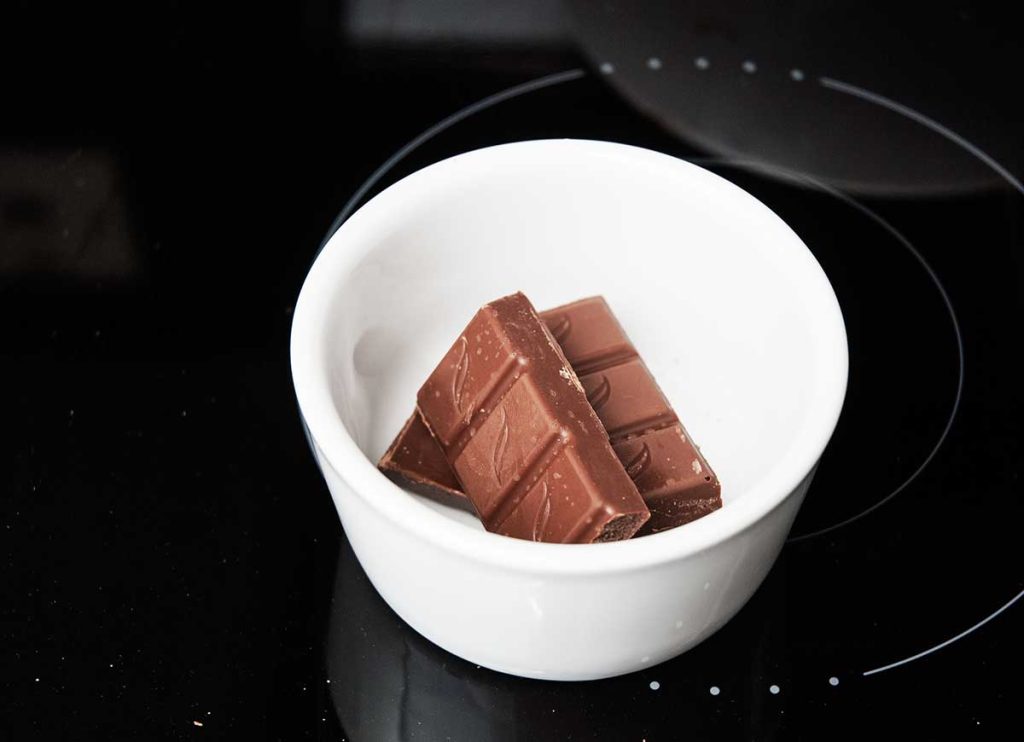
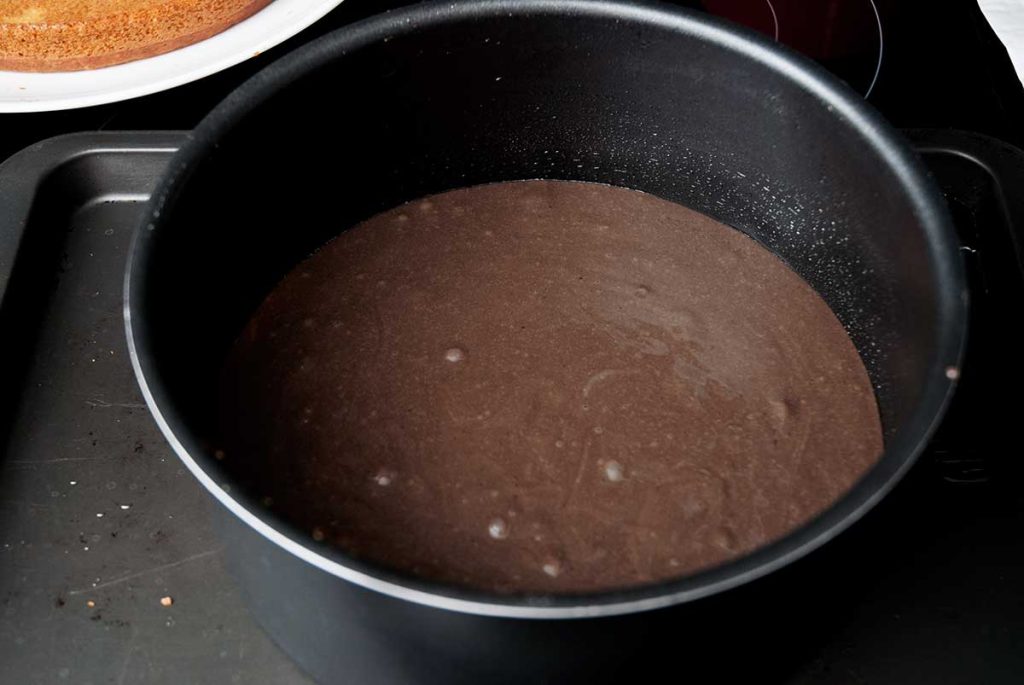
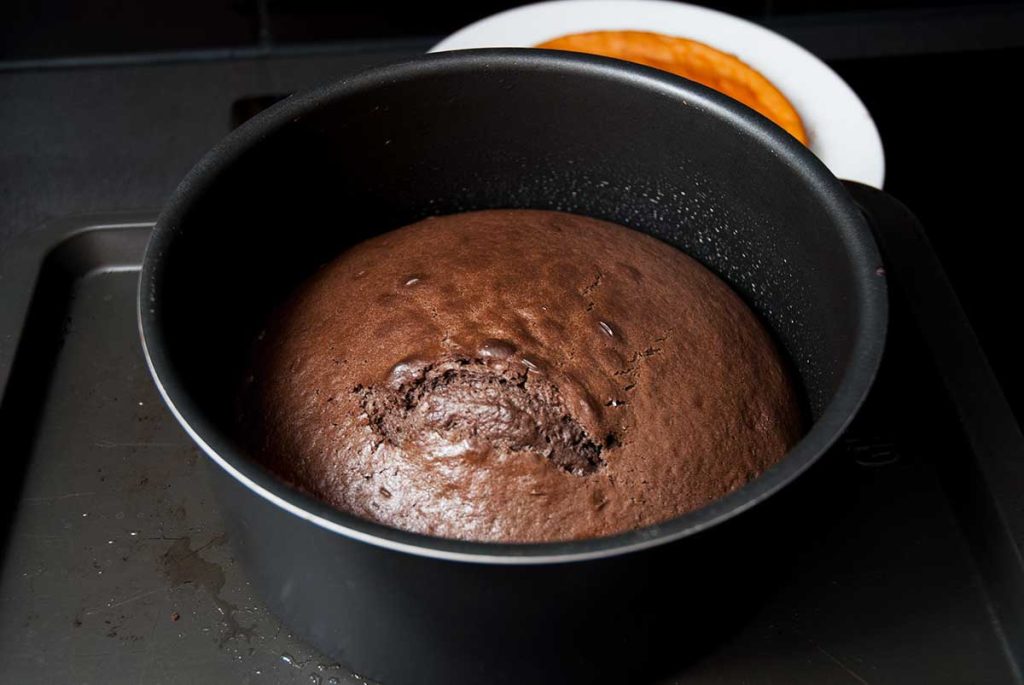
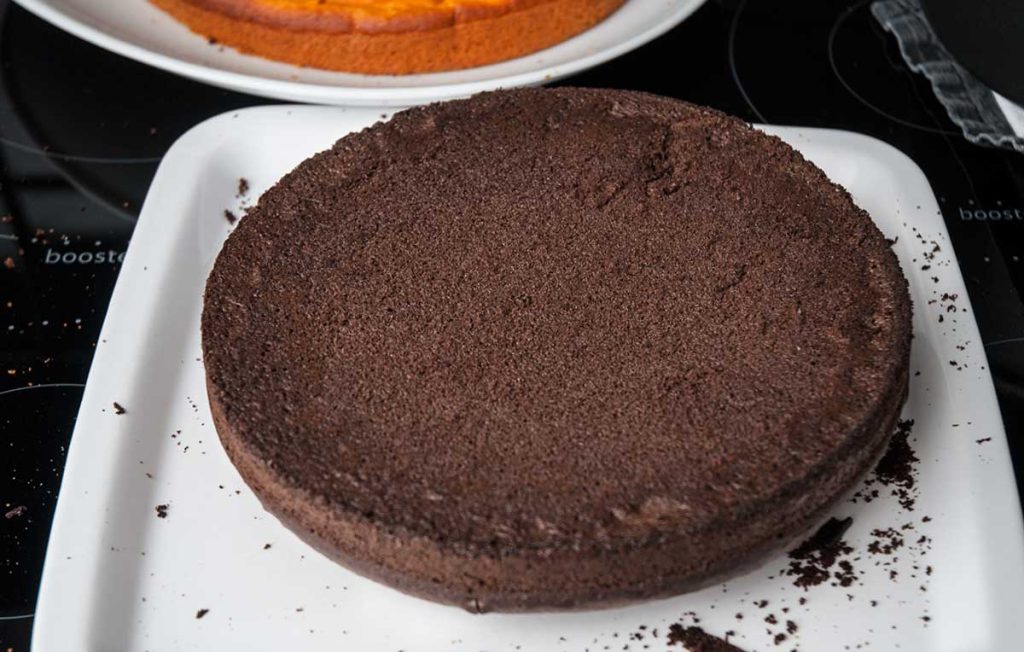
- Place pieces of the chocolate bar into a small bowl and microwave for a few seconds until melted
- Add the melted chocolate, chocolate extract and black food colouring to the second portion of the sponge mixture. Mix well until fully combined.
- Pour the batter into a cake tin and bake at 170°C for about 25-30 minutes.
Don’t worry if the cake rises quickly and “cracks” in the centre as it bakes. Simply turn the cake upside down when done, the weight will help flatten the uneven surface.
The cake will look very dark from the black colouring; rest assured, it’s not overbaked or burnt! 🙂
Cocoa and walnut sponge cake layer
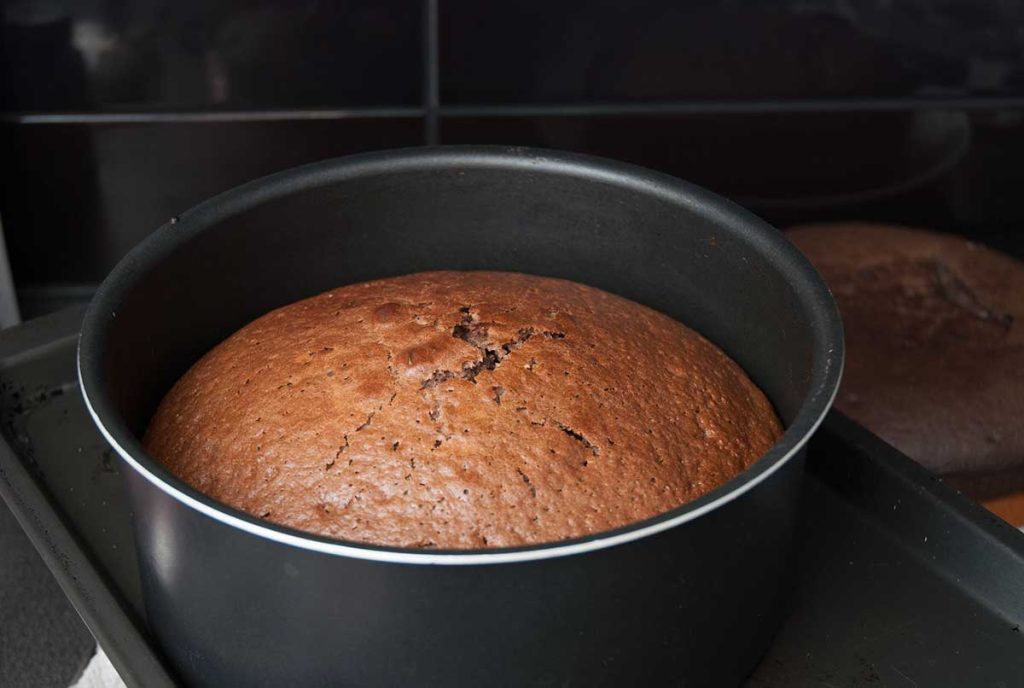
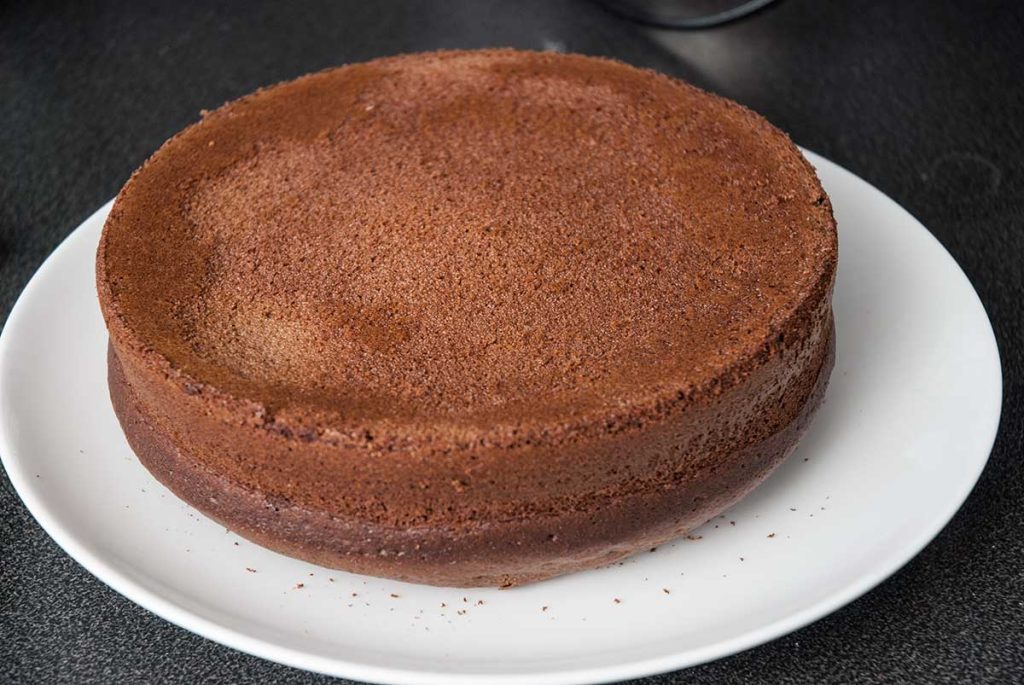
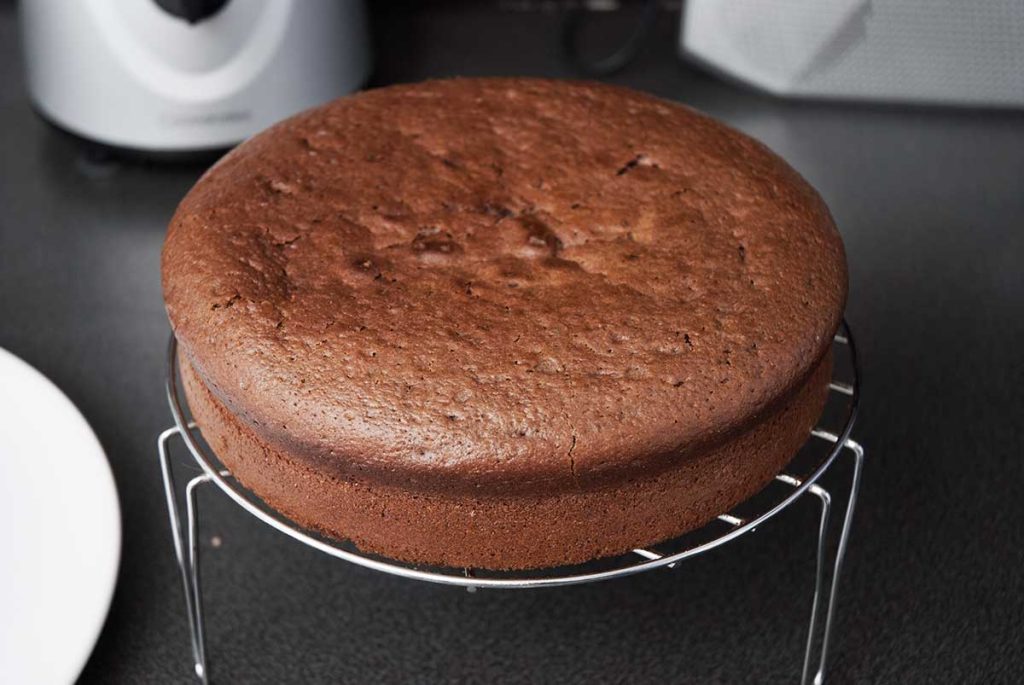
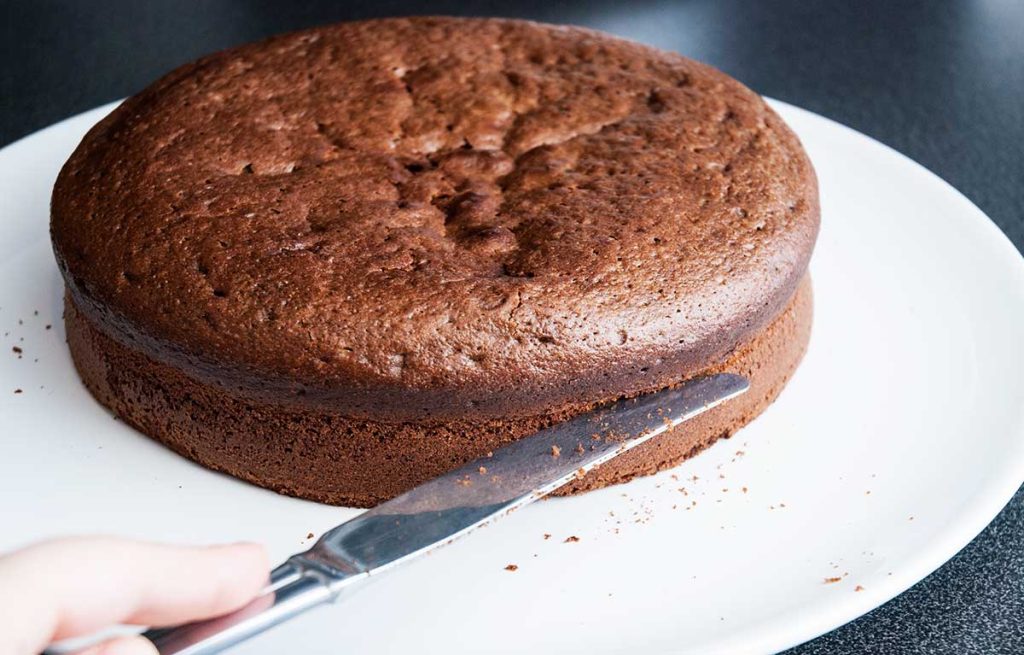
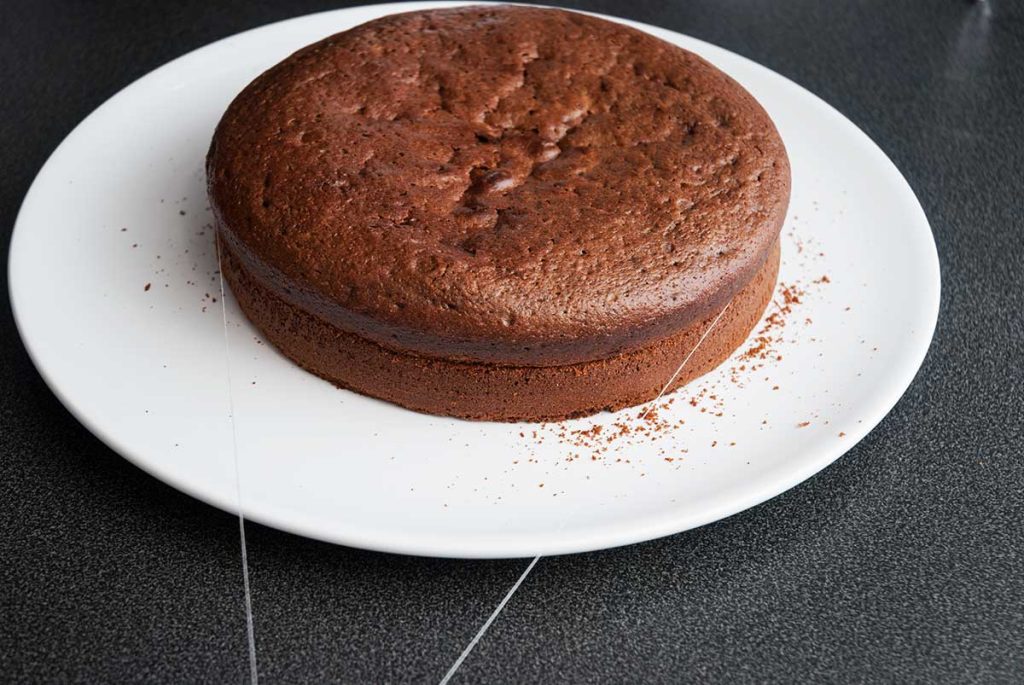
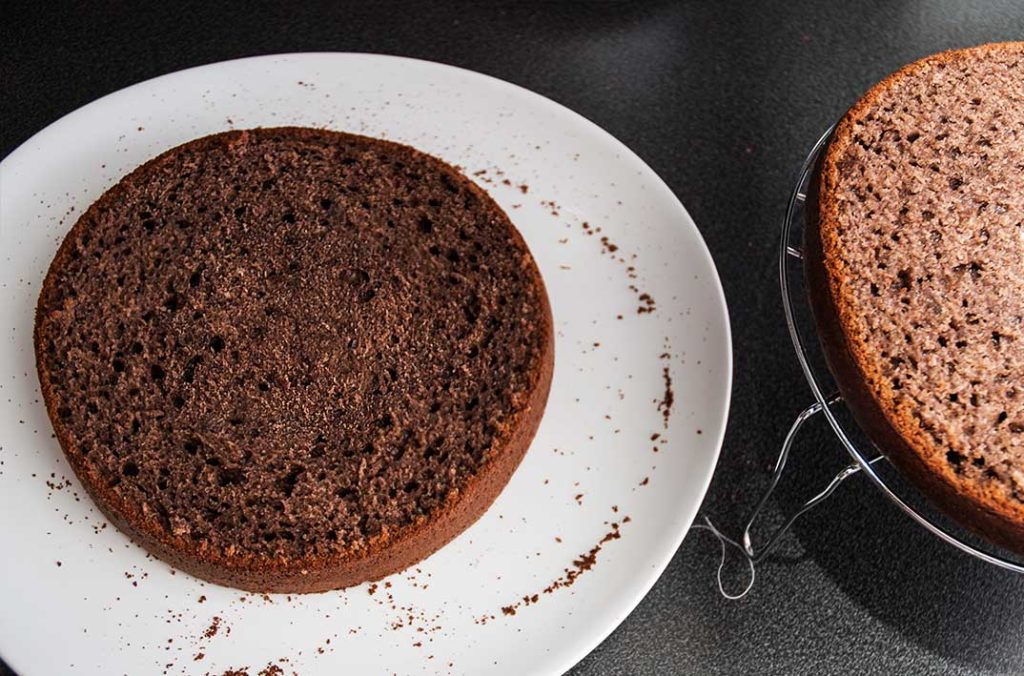
The remaining half of the batter will be used for the final two layers. To save time, bake it all at once and then slice it in half to create two layers.
- Add the cocoa powder, rum and finely ground walnuts to the mixture. Next, pour it into your cake tin and bake at 170°C for 35 to 40 minutes. The baking time is slightly longer since you’re making a larger cake. Always check if the sponge is done by inserting a long toothpick or skewer into the centre; if it comes out dry, you’re good to go!
- Once baked, remove the cake and let it cool.
- When the cake has cooled slightly, use a knife to make a shallow cut around the edge of the cake, about 2 mm deep.
- Take a long piece of cotton thread and carefully position it into the shallow cut. Hold both ends of the thread and slowly pull them towards yourself, letting the thread slice through the cake evenly. This method gives you a perfectly level cut with minimal fuss.
Filling
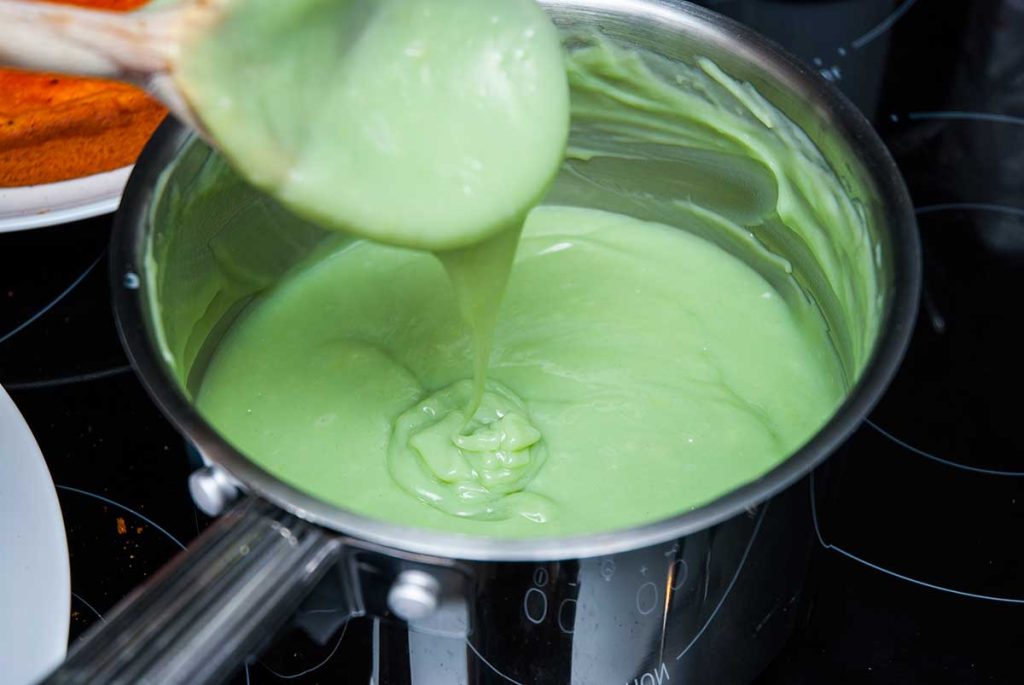
Green Cream
The cream is similar to French crème pâtissière, with a rich and smooth texture, perfect for filling cakes and pastries.
- Combine the flour with half a cup of milk in a small bowl, mixing until it forms a smooth paste without lumps.
- In a saucepan, pour in the remaining milk and heat it gently. Add a pinch of salt, sugar, vanilla extract (or vanilla sugar) and rum. Just before the milk begins to heat up, stir in the flour mixture. Keep stirring continuously with a wooden spoon over the lowest heat as the mixture gradually thickens.
- After 2-3 minutes of cooking, remove from the heat and whisk in the beaten egg yolks. Continue to mix until you achieve a smooth consistency.
- Finally, add the green food colouring and blend it well. Set the cream aside to cool, remembering to stir it every few minutes to prevent skin from forming on the surface.
Note: For those wary of raw eggs, don’t worry, when you remove the mixture from the heat and stir in the beaten egg yolks, the residual heat will gently cook them, making them safe to eat.
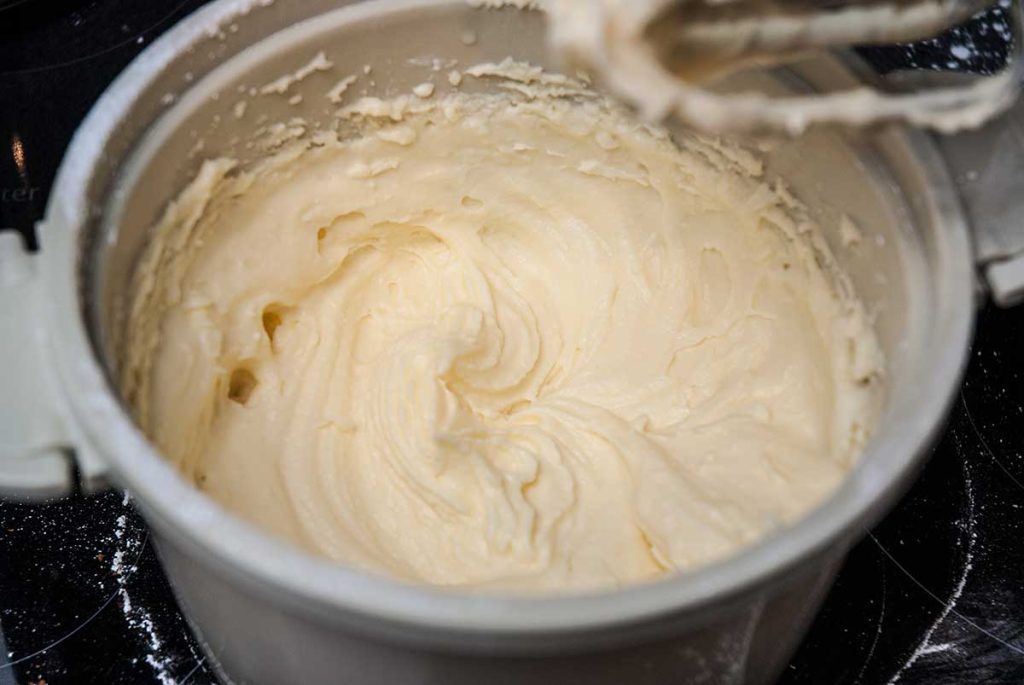
Buttercream
- Start with cold butter straight from the fridge. In a mixing bowl, combine the butter with icing sugar and vanilla. Use an electric mixer to blend the ingredients to a creamy consistency.
- Gradually add in the cream while continuing to mix until everything is well combined and smooth.
Assembling the Cake
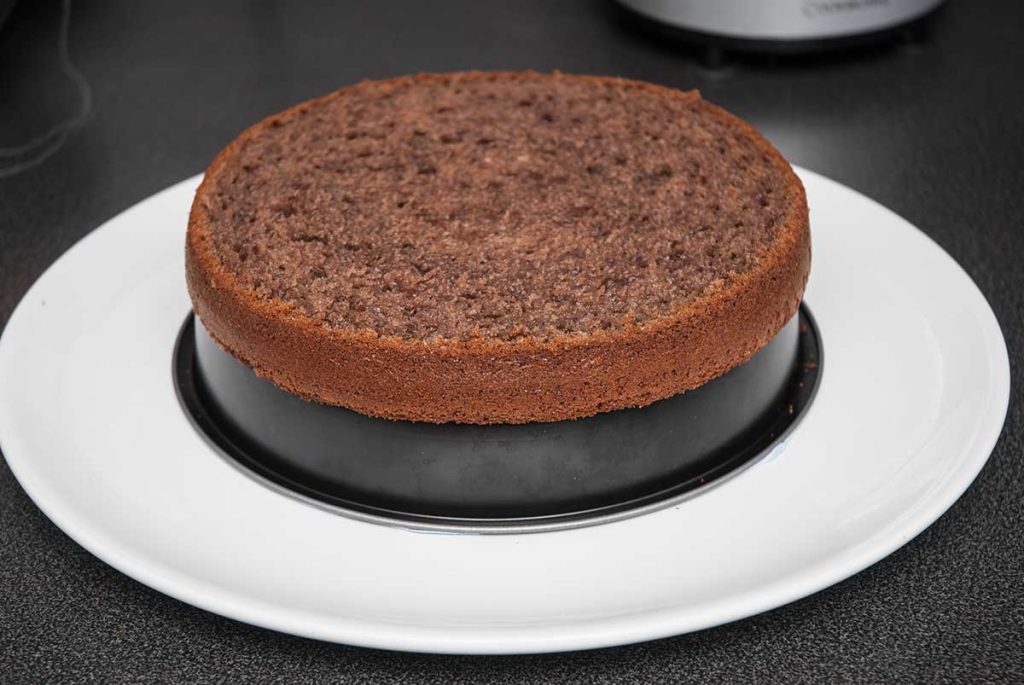
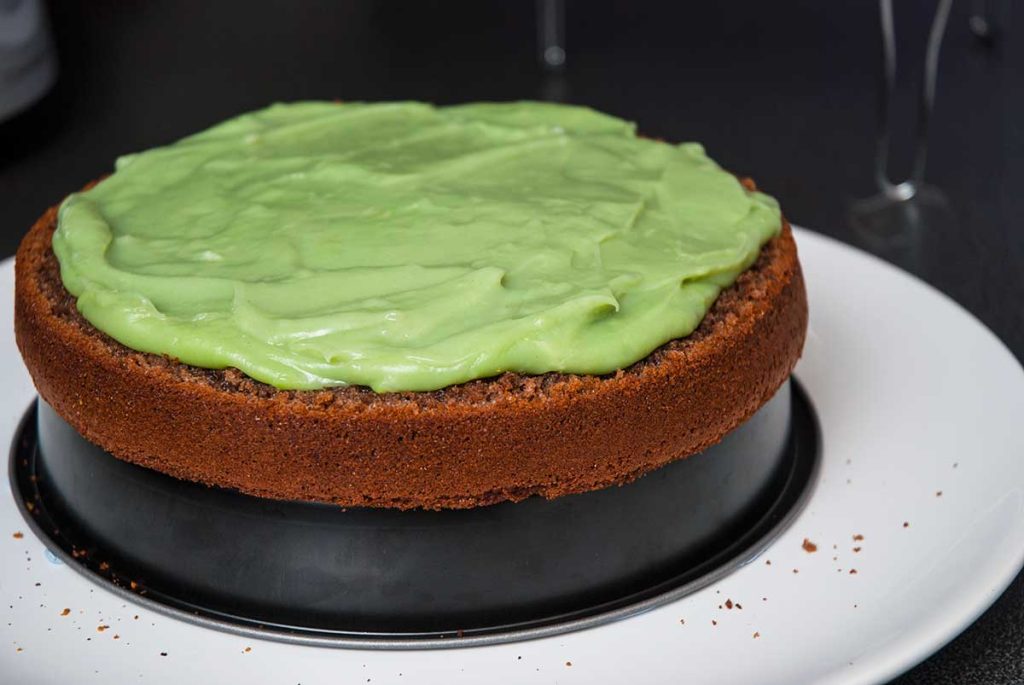
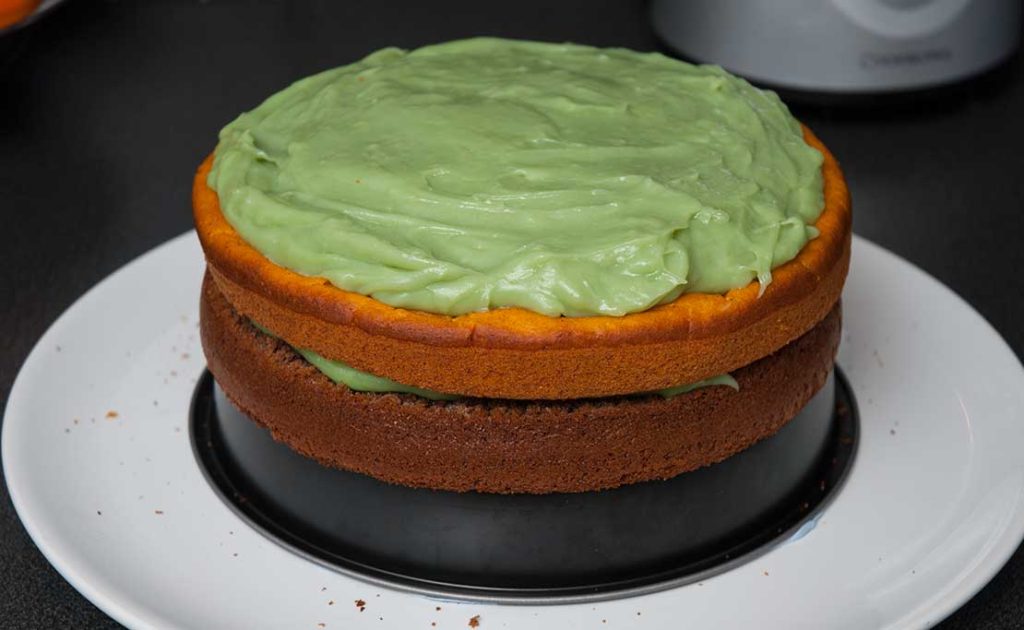
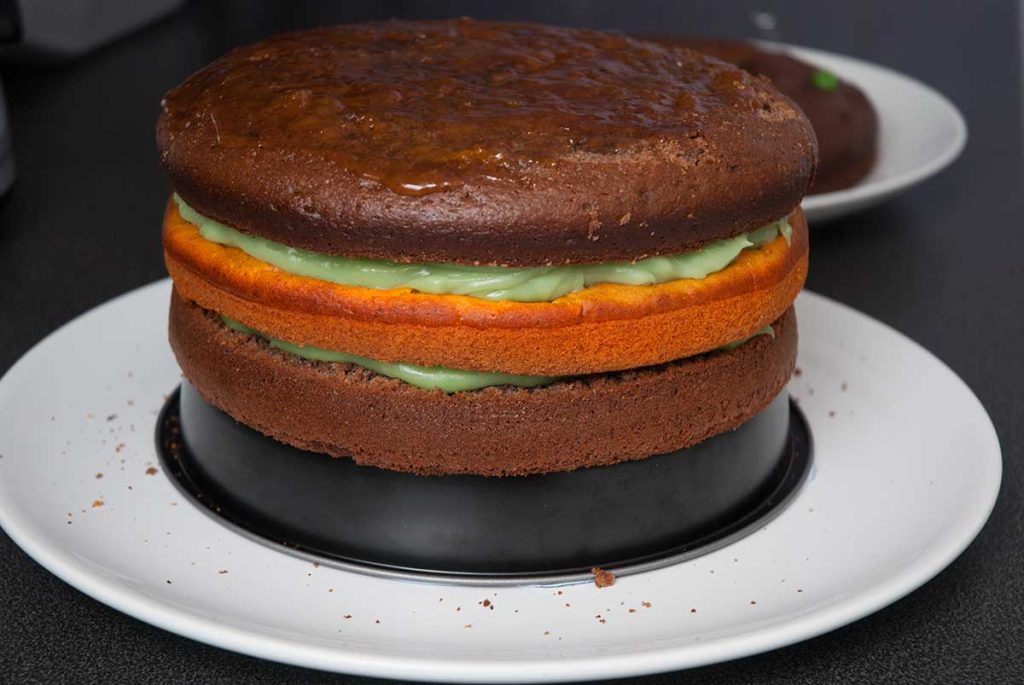
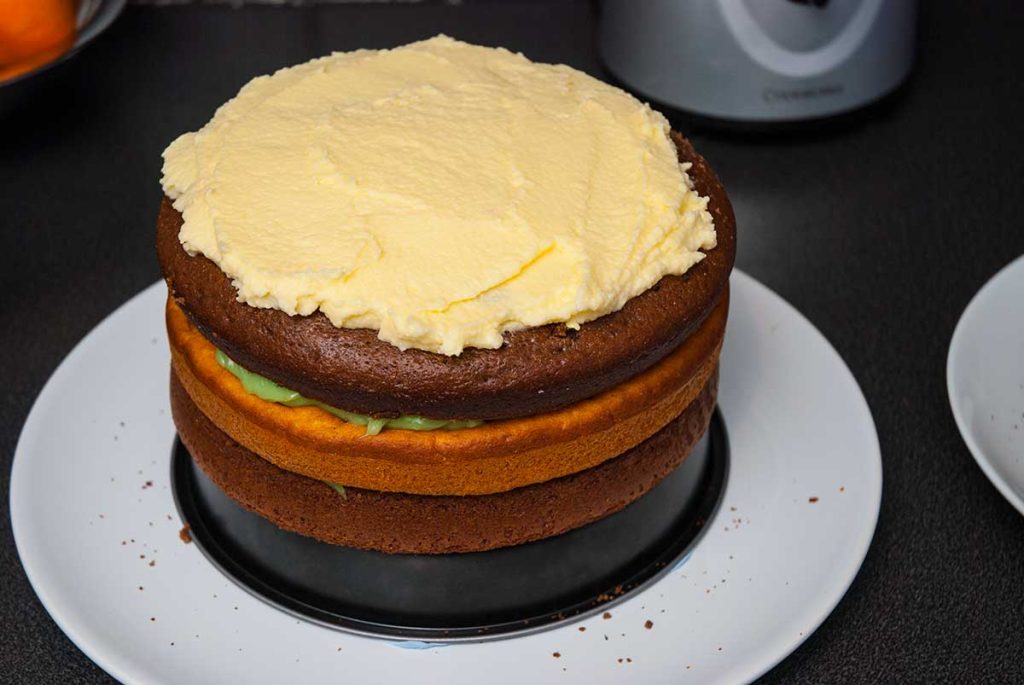
Note: I assembled my cake on a small round tray turned upside down, which lifted the cake above the plate surface. This setup made it easier to apply the icing. To conceal the tray, I tied some colourful ribbons around it, but you can display the cake however you prefer. If you’re making a plain cake instead of a pumpkin shape, there’s no need to elevate it this way.
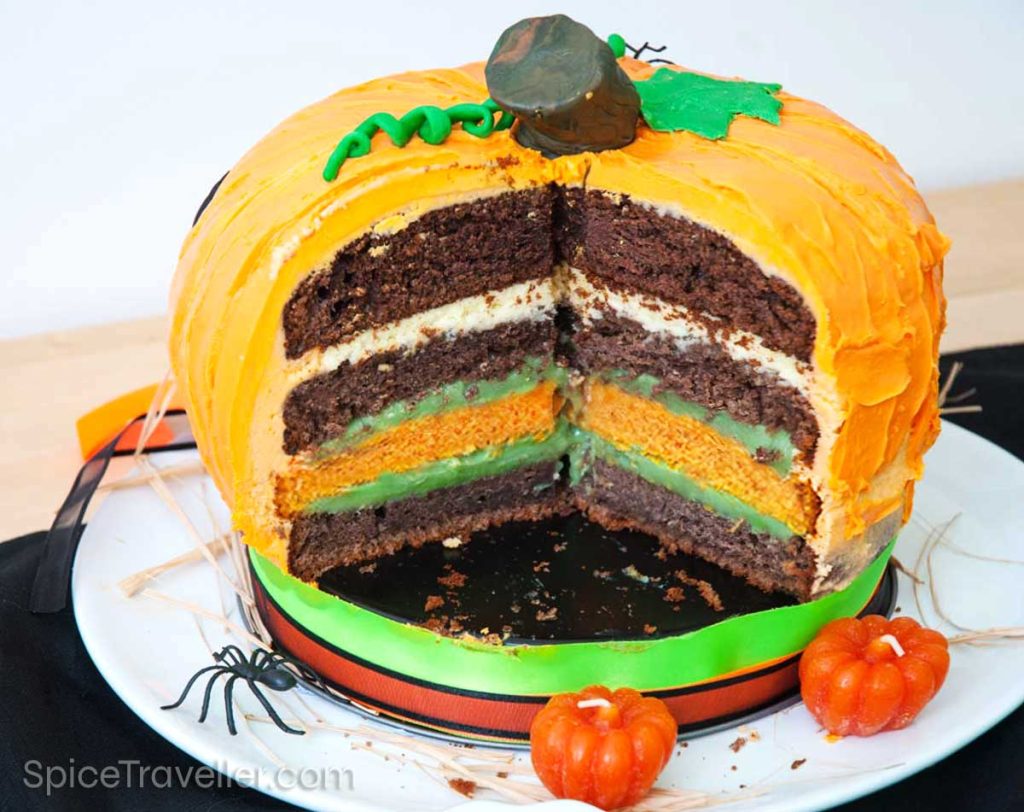
- Place your first cocoa and walnut sponge cake layer on the plate or cake tray. Add some green cream and spread it evenly, about 1cm thick. If the cream is still warm, let it cool before adding the next cake layer.
- When the green cream has set nicely, gently add the pumpkin sponge layer on top. Don’t press too much. Spread the rest of the green cream over this layer. Next, add the top layer of cocoa and walnut sponge cake. Drizzle the layer with some warm milk, just enough to moisten it, then spread a thin layer of apricot jam evenly on top followed by buttercream.
Tip: If the jam is too thick, place it in a cup and add a splash of hot water to loosen it. This will make it easier to spread over the cake.
- Finally, finish off with the chocolate layer as the last one.
If you are making a pumpkin-shaped cake, trim a bit off the top and bottom of the cake, so the middle is wider than the top and bottom. I forgot to do this part and had to use extra icing to create the pumpkin shape instead.
Icing for the Jack-o’-Lantern Shape
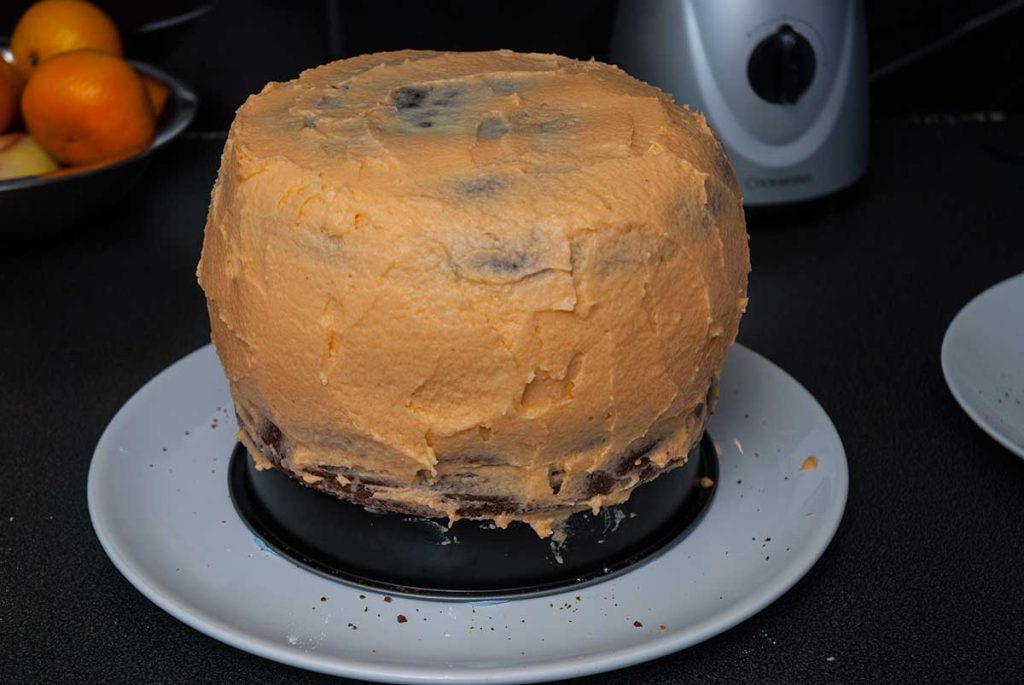
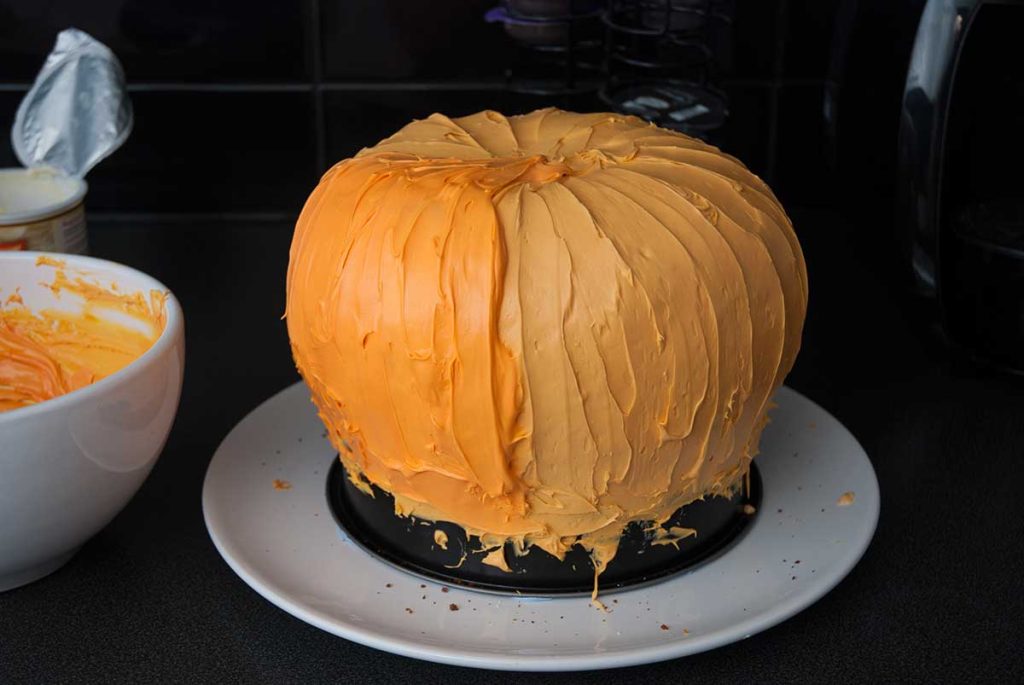
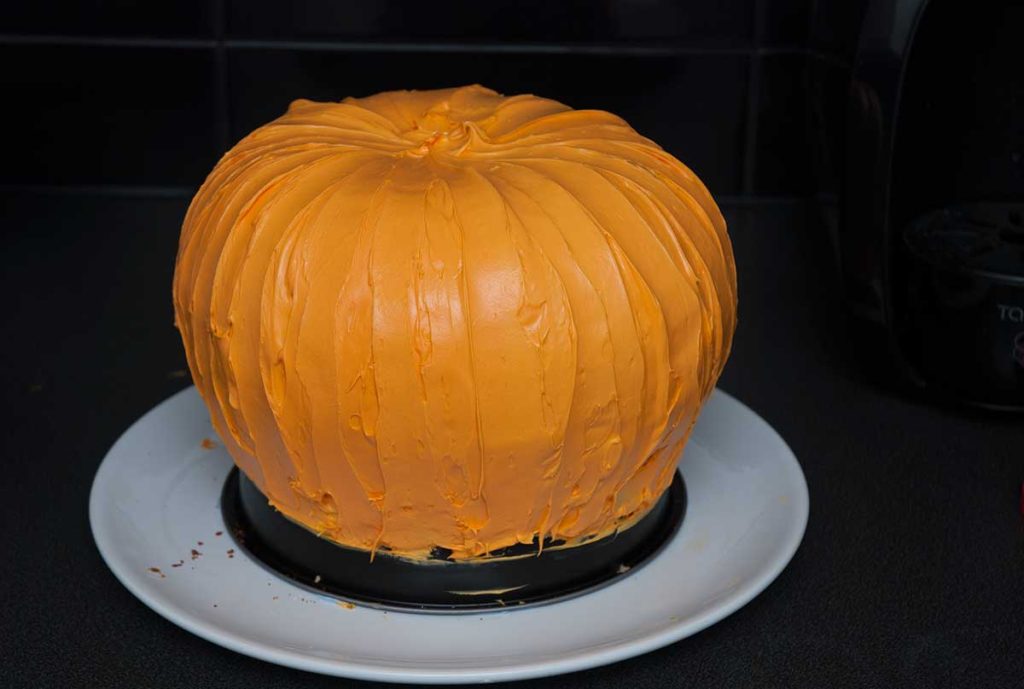
- Now, whip up the icing cream. You can add some orange food colouring if you like, but it’s not essential, this is the first layer. Don’t worry if it’s not perfectly covered. I added a little extra around the centre to help with that pumpkin shape.
- Place the cake in the fridge to let the icing set. While the cake is cooling in the fridge, prepare your second layer of icing and add orange food colouring this time.
After 30 minutes in the fridge, take the cake out and cover it with a slightly thicker layer of icing than before, adding extra where needed to maintain the pumpkin shape. Pop it back in the fridge to set the icing again. - Finally, prepare another batch of icing cream, this time adding a bright orange for the final layer. Spread the icing slowly and with patience, lifting from the base to the top with your knife. As this is the final layer, aim for a perfectly smooth, even coverage. I used around 450 grams of store-bought icing, adding orange colouring as needed.
And there you have it! The cake is fully covered with the last layer of icing. I used one chopstick to create pumpkin indentations for a natural look.
Decorations
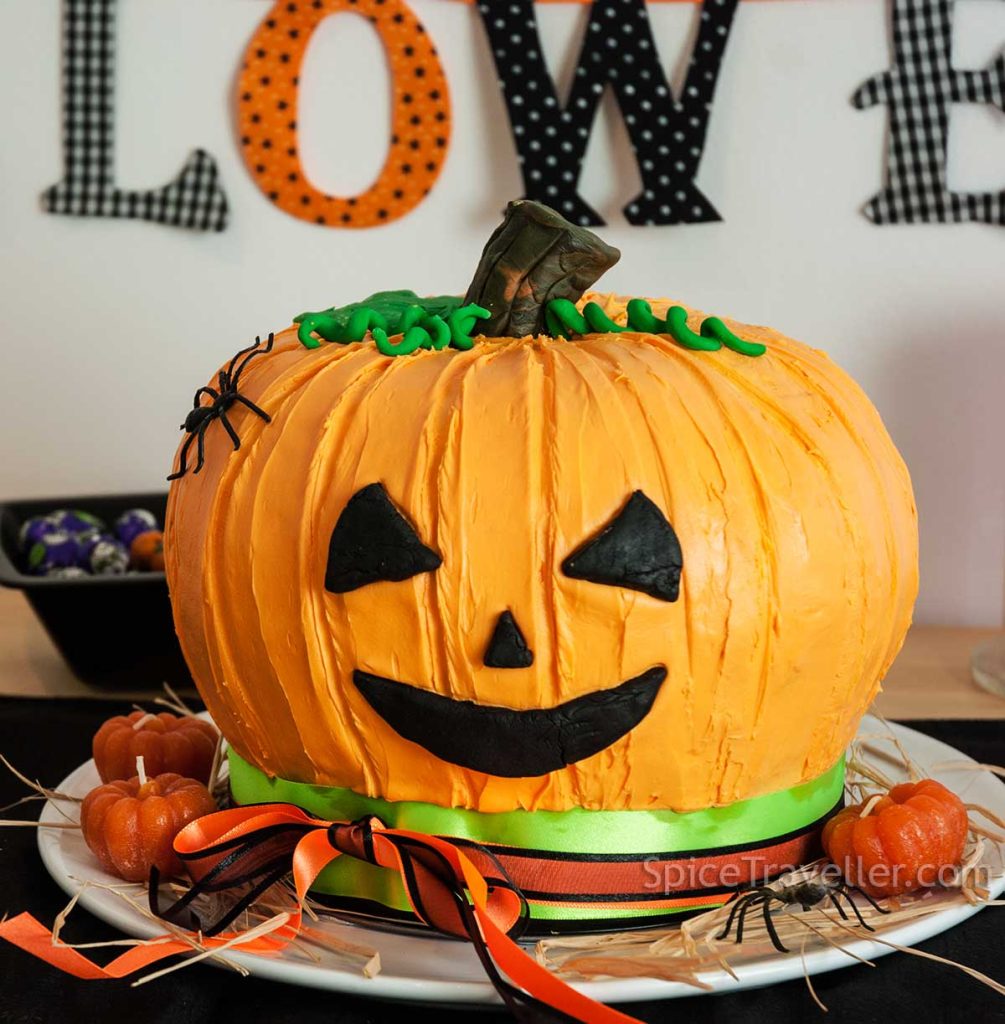
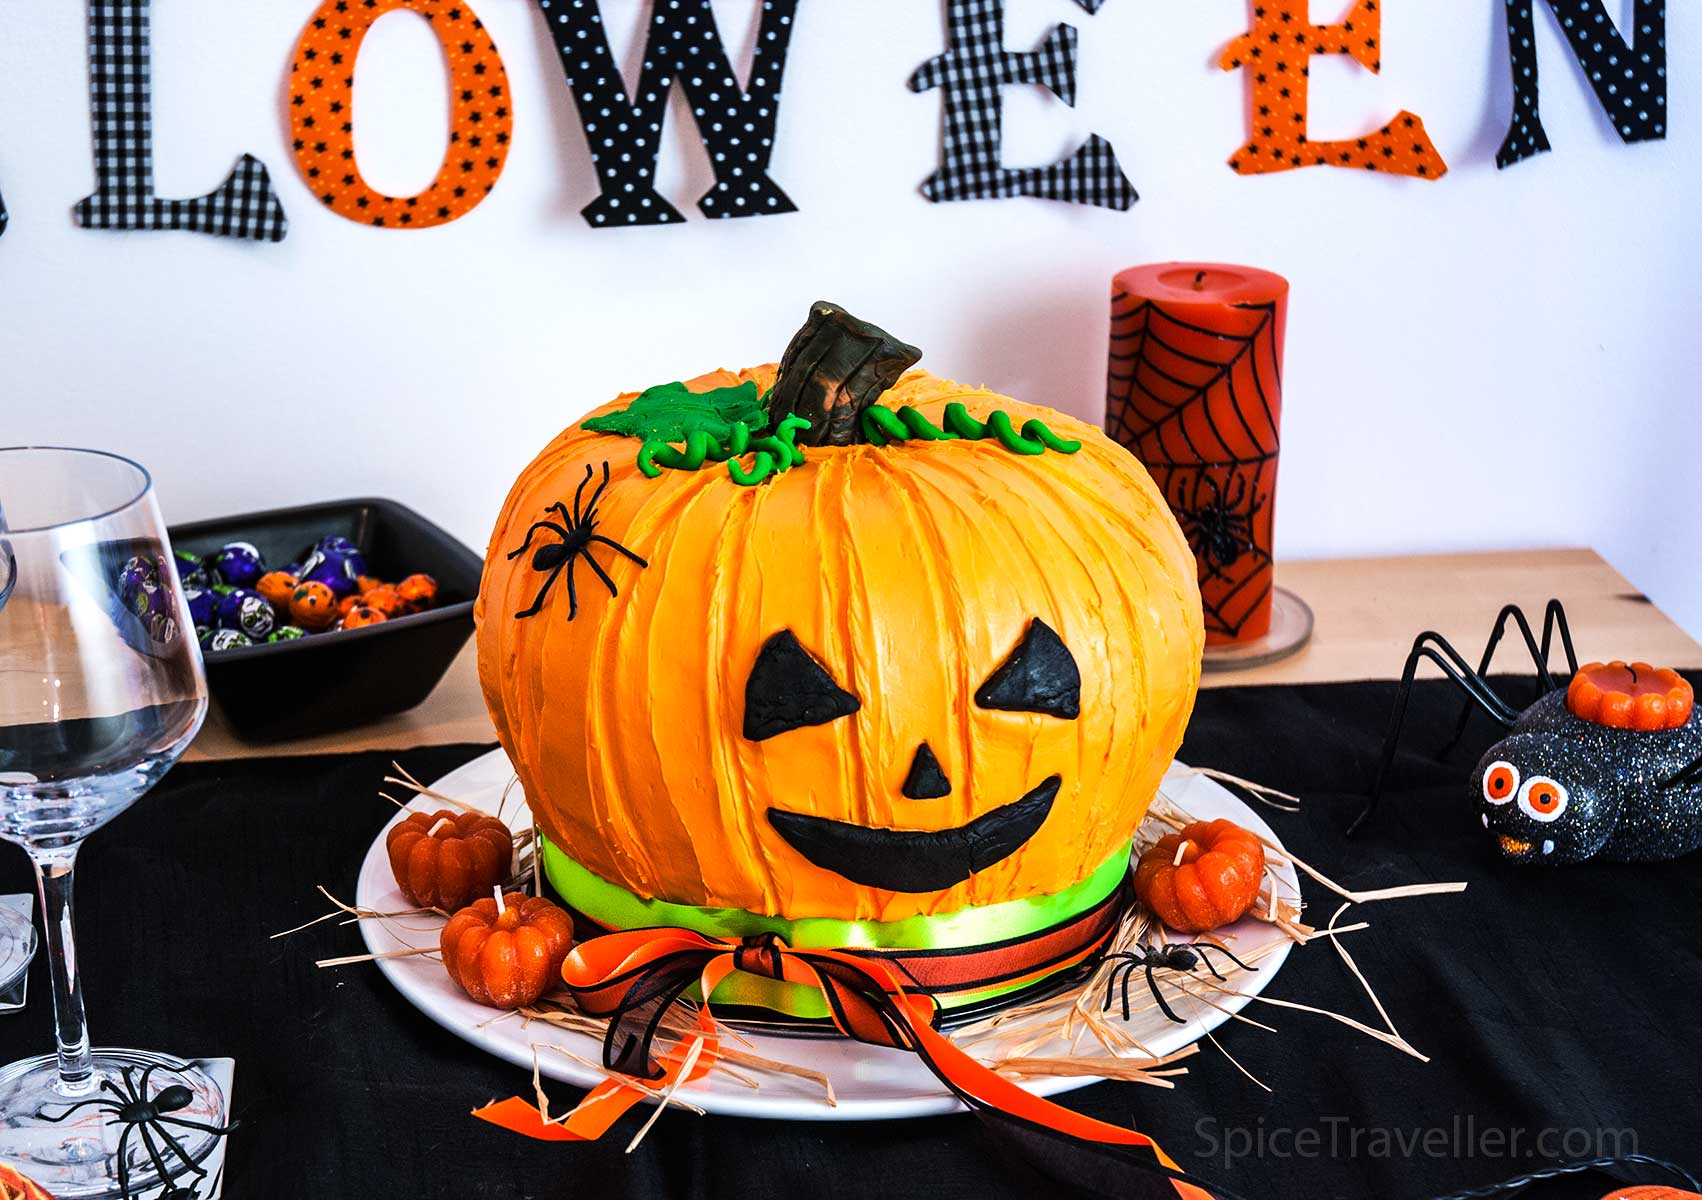
Decorate the pumpkin with fondant; create green leaves, a stem, eyes, nose, and mouth. Feel free to add your own creative touch.
Happy Halloween! 🎃👻🕷️🧛♂️🦇⚰️🕯️🖤🍬🍭

Recipe Card
Jack-o’-Lantern Pumpkin and Chocolate Sponge Cake with Cream 🎃
Ingredients
SPONGE CAKE BASE
- 225 g plain white flour
- 1 tbsp baking powder
- 175 g granulated or caster white sugar
- 3 eggs
- 150 ml oil
- 150 ml plain set or Greek yoghurt
CAKE FLAVOURS
pumpkin cake:
- 1 small pumpkin
- 1 tsp cinnamon
- ½ tsp nutmeg
- a few drops orange food colouring
chocolate cake:
- a few bars good quality cooking chocolate
- 1 tsp vanilla extract
- 2 tsp chocolate extract
- a few drops black food colouring
cocoa and walnut cake:
- 3-4 tbsp cocoa powder - good quality, unsweetened
- 4-5 tbsp ground walnuts
- a few drops black food colouring
FILLING
green cream:
- 4 egg yolks
- 5 tbsp plain white flour
- 1 tsp vanilla sugar or extract
- 2 tbsp rum
- ¾ cup caster or granulated white sugar
- 2 cups milk
- a few drops green food colouring
- a pinch salt
buttercream:
- 150 g icing sugar
- 100 g unsalted butter
- 100 ml double cream
- 1 tsp vanilla extract
OTHER
- 4-5 tbsp milk
- 3-4 tbsp apricot jam
Icing – 1st layer
- 150 g icing sugar
- 100 g butter
- Orange food colouring - optional
Icing – 2nd layer
- 250 g icing sugar
- 175 g butter
- a few drops Orange food colouring
Icing – 3rd layer
- Same as Icing Layer 2 - but you can also buy plain ready-made icing cream and add orange food colouring.
Decoration
- fondant of your choice
Instructions
Note:
If you’ve jumped straight to the recipe card, please take a moment to go back and read through the entire recipe post. It contains valuable details, tips, and instructions that will help you achieve the best results with your cake! 🙂
- Roasting the Pumpkin: Score the top of the pumpkin with three or four deep cuts to prevent bursting. Place the pumpkin on a baking tray (no oil needed) and roast at 200°C for 25-30 minutes until it darkens slightly.
- Once cooled, cut into wedges, peel off the skin, and scoop out the seeds. Mash the roasted pumpkin with a fork or blend it to a smooth purée, depending on your sponge cake texture preference. Store in the fridge for later use.
- Make the Sponge Cake Base: Whisk eggs, vanilla sugar and caster sugar until light and fluffy. Add yoghurt and oil, mixing briefly. Sift in flour and baking powder, folding gently to avoid overmixing. The batter should be smooth and thick.
- Divide the Batter: Split it into two equal portions; and then one of those portions into two again, one is for the pumpkin and the other for the chocolate sponge cake layer, and keep the rest of the batter (2/4) for the walnut sponge cake layer.
- Pumpkin sponge cake: In the first batter portion, add mashed pumpkin, cinnamon, and nutmeg. Mix gently. For orange colour, mix yellow and red food colouring until the desired orange shade is achieved, then add it to the pumpkin batter mixture.Pour the pumpkin batter into a 9-inch cake tin and bake at 170°C for 20-25 minutes. Avoid opening the oven for the first 15 minutes to allow the sponge to rise evenly. Check doneness with a wooden stick; it should come out clean.
- Chocolate sponge cake: Microwave pieces of chocolate bar for a few seconds. Add melted chocolate, chocolate extract, and black food colouring to the second batter portion. Mix well and pour into a cake tin. Bake at 170°C for 25-30 minutes. If the top of the cake cracks open during baking, once done, turn it upside down on a plate to flatten it.
- Cocoa and Walnut Sponge Cake: Use the remaining batter for two layers. Add cocoa powder, rum, and finely ground walnuts. Bake at 170°C for 35-40 minutes. Check for doneness as before.Once cooled, make a shallow cut around the edge. Use a piece of thread to slice the cake evenly into two layers.
FILLING
- Green Cream: Combine flour with half a cup of milk until smooth. Heat the remaining milk, adding a pinch of salt, sugar, and vanilla extract. Stir in the flour mixture, stirring continuously until thickened.Remove from heat, whisk in beaten egg yolks, and add green food colouring. Set aside to cool.
- Buttercream: Using an electric mixer, combine cold butter, icing sugar, and vanilla until creamy. Gradually add the double cream while continuing to mix until you reach a smooth consistency.
- Assembling the Cake: Place the first cocoa and walnut sponge layer on a plate. Spread green cream evenly (about 1cm thick). Let it cool if warm.Gently add the pumpkin sponge layer on top, spreading the rest of the green cream over it. Now add the second cocoa and walnut sponge layer. Drizzle with warm milk and spread a thin layer of apricot jam. Follow with buttercream. Finish off with the chocolate layer as the last one.Tip: If the jam is too thick, add a splash of hot water to loosen it.
- Icing for the Jack-o’-Lantern Shape: Prepare the icing; you can add orange food colouring if desired, but it is not essential for the first layer. Cover the cake with icing, not worrying about perfection, and refrigerate to set (for about 30 min minimum).After 30 minutes, apply a thicker layer of icing, adding more where needed to maintain the pumpkin shape. Refrigerate again.Prepare another batch of icing, adding bright orange this time. Spread it slowly and patiently for a perfectly smooth finish.
- Decorate with fondant to create green leaves, a stem, eyes, nose, and mouth. Feel free to add your own creative touch!
